Showing posts with label maintenance. Show all posts

Thursday, June 26, 2014

How to Maintain an Electric Chainsaw

Electric chainsaws are quieter, lighter-weight than gas models, and easy to start. All they need to run is an extension cord and an outlet.

But what about maintenance? After all, one of the advantages of an electric chain saw is not having to do oil changes and refill the gas, right?

Electric chainsaws are definitely cleaner and easier to maintain than gas models, but they do still require some maintenance. To keep your chainsaw running smoothly for years to come, here are few tips to consider following.

Chain Oil
While you don't have to change out motor oil, your chain isn't very fond of dry friction against the bar. It's very important to stay on top of keeping your chain lubricated with oil to prevent it from wearing out. Oiling the chain will also aid in providing a smoother cut. Any clean motor oil should do, but if you're using your saw in cold winter weather, be sure to use an oil with a lower viscosity.

Chainsaw Bar
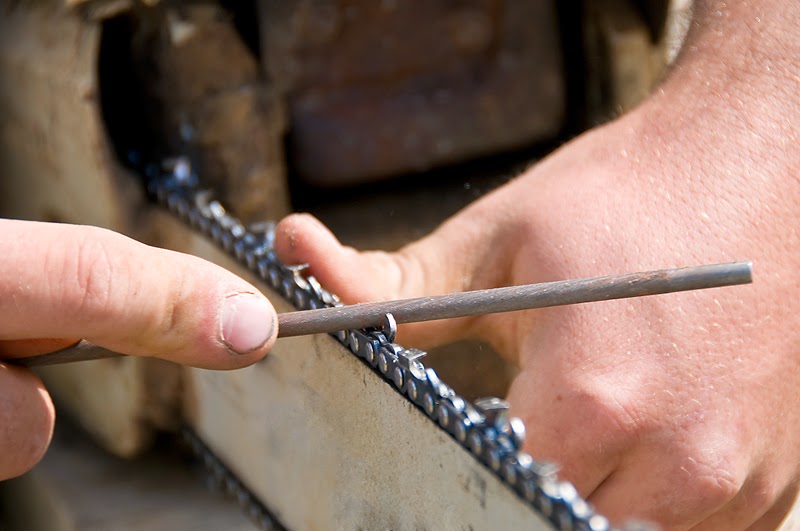
Wear and tear can present issues with a bar. Be sure to clean out any dust or debris in the bar's groove. You can use a wire, pipe cleaner, etc. to do this. Inspect the bar for any burred edges, and file any down outside the groove. If your bar is cracked, bent, or excessively worn, change it out with a new bar.

Extension Cord
If you're operating an electric chainsaw, you will inevitably have to maintain a safe and functional extension cord. Make sure you use an extension cord that's approved for outdoor use. They're usually marked with a W or W-A suffix.  Using an indoor, improperly sized extension cord can cause your saw's motor to overheat and suffer damage. If your cord ever becomes frayed or worn to the point where it's exposing any wiring, dispose of it and get a new one.

Long-Term Storage
Before putting away your chain saw for the winter, it's a good idea to winterize it for storage. Drain chain oil and remove the chain and bar. Soak and clean the bar and chain, dry them, then apply a thin layer of oil to help preserve them and prevent rusting. If your chain is too worn down to be sharpened, dispose of it and replace it for the next season. If the chain is damaged or broken, don't attempt to repair it - buy a new one.

Wednesday, May 14, 2014

Chipper Maintenance Made Easy


More Chipper Maintenance Tips
Spring is here, and summer is approaching. This means you likely have some cleanup to do on your property. With springtime storms, you may find a lot more debris on your lawn, and new landscaping often means "out with the old."

So what do you do with all of the debris and old shrubs and trees you're getting rid of? Perhaps you take them to the curb for pickup, or maybe burn them in a pile? A much better alternative is chipping. This will provide you with a way to recycle what you're getting rid of.

Chippers can turn old dead eyesores into a beautiful and functional mulch to use in your flower beds and other areas to beautify your property, control weeds, and save you from spending more money at the local garden shop.

Along with using chippers comes maintenance. With the right understanding of what needs to be done and when, you'll find that maintaining your chipper shredder is easier than you think.

Below is a chart from MTD that will help you keep track of what needs to be done and how frequently. You can print it off, laminate it, and nail it to the wall inside your shed. this way you can use a dry-erase marker to check off each thing you do and erase your markings at the end of each year.

mtd's WOOD CHIPPER MAINTENANCE CHART 


Chipper/Shredder Maintenance
Before each use
Every 8 hours
Every 25rs
Every 50 hours
Annually
Clear Grass & Debris Away from Muffler & Engine
X
Clean Control Linkage
X
Fill Fuel Tank
X
Fill Oil
X
Lubricate All Moving Parts
X
Lubricate Chute Release Rod
X
Lubricate Control Levers & Check for Smooth Operation
X
Lubricate Hopper Assembly & Discharge Chute at the Swivel Pivot Joints. Test Full Range of Motion.
X
Replace Air Filter
X
Change Oil
X
Replace or Sharpen Chipper/Shredder Blades
X
Replace Spark Plug
X
Wash Collection Bag
X

Friday, January 3, 2014

Electric Log Splitter Hydraulic Oil

Electric log splitters may not require gasoline, but they do require the use of hydraulic oil. For electric log splitters, it's recommended you use hydraulic oil with a 10W weight rating. This type of hydraulic oil is capable of properly lubricating the moving parts of your splitter during cold or hot weather.

In addition to lubricating your splitter's moving parts, this hydraulic oil is also used for pressurizing the hydraulic system. When you start the motor, the hydraulic system begins to build up pressure with the hydraulic oil. The splitter is then capable of applying enough pressure on the log to split it against the splitter wedge.

You need to change the hydraulic oil in your log splitter after every 150 hours of operation time. If you don't, you run the risk of damaging components within your hydraulic system when the sediment within the oil settles onto your splitter's hydraulic components.

It's also possible for the oil levels to get low if now maintained properly. If your log splitter motor is giving off a humming sound and the pusher isn't moving, you may need to add more oil. If it's been a while, you should first drain the old oil and then refill it with the proper amount of fresh oil. Use your dipstick to measure the oil level to ensure it's where it should be.

Lastly, be sure you're bleeding your hydraulic system during use. Electric log splitters have a bleed screw that allows air out of the system to prevent over-pressurizing it. The bleed screw should remain tightened shut during storage or whenever the splitter is being moved., but should be opened whenever in use to avoid damaging the internal components.

Thursday, December 12, 2013

Indoor Log Splitting - Done Safe

Nobody likes going outside to split firewood when it's cold enough to freeze your nose hairs, but how else are you going to split more firewood to keep the family warm?

Splitting wood indoors is far too dangerous with a gas-powered log splitter, in fact it's downright deadly because of the poisonous exhaust fumes. Electric log splitters are safe indoors, but they're inconvenient and take up space.

Manually-operated log splitters are by far the most sensible option. The WoodEze manual firewood splitter is incredibly convenient and safe for splitting up firewood. 

1. Find yourself a hardwood stump and drill a 12 cm hole in the top. 
2. Insert the splitter into the hole.
3. Tighten bolt with a wrench to secure the splitting wedge.
4. Lift the handle and place the log to be split under the wedge.
5. Lift the striking weight with both hands and then drop it onto the wedge.

It's safer and easier than an axe, and the guide bar keeps it on target every time. It strikes with up to 14 tons of pressure at the edge of the blade. The size makes it easy to stow away, and the simplicity and sturdiness of the construction means there's no maintenance required.

So as long as you have relatively small logs that are able to be split, you can split firewood into smaller pieces from the warmth and comfort of your living room. And you don't have to be concerned with the dangerous fumes of gas splitters.

Thursday, November 14, 2013

How to Winterize a Wood Chipper

We all know the frustration of pulling out power equipment in the spring or summer to find that it won't start like it should. 

It's so easy to push your wood chipper to the back of the garage when winter gets here and forget about it for a few months, but without properly winterizing it, you may have a bad time in the spring.

If you want to have an easy time starting and operating your chipper next season, here are a few tips on proper winter storage and maintenance that we recommend.


Electric Chippers 

Electric chippers are a lot easier to take care of than gas chippers, because there is no fuel or fluids involved; however, when it comes to winterizing an electric chipper, there are a few simple things you should do.

  • Clean out the unit as well as you can, all the way down to the chipper blades if you are capable, to insure that no leaves, dirt, or sap will sit in your chipper for months without movement. An air compressor can help accomplish this.
  • Once you've finished cleaning it and putting it back together, it's a good idea to apply a small amount of grease or lube to all of the moving parts. 
  • Last, but not least, go and buy yourself an inexpensive universal cover to keep dust and rodents from making your machine their winter home.


Gas Chippers

Gas chippers require a couple of extra steps. The tips for electric chippers still apply, but the gas engine requires a few extra tips that should not be forgotten. The engine is the heart of your gas chipper, and just like you have to care for your own heart, it's important to care for your chipper's as well.

  • Follow the same tips noted above for electric chippers. Then continue to follow the tips below.
  • Drain all gasoline from your chipper and run the engine dry. If you don't want to waste the fuel or go through the trouble of draining it, you should at least add fuel stabilizer to prevent the fuel from spoiling.
  • Change the oil and replace the spark plug. You can do this prior to storage, but I recommend doing it at the start of the next season. Changing your oil and replacing your spark plug at the start of the next season ensures that everything's fresh, and will assist an a much easier start-up.


Well I hope these tips helped, and stay warm this winter my friends!


Friday, October 25, 2013

Keeping Engines Clean With Detergents!


Gasoline is something you may not give a lot of thought to, but the type of fuel you use in your chainsaw makes a difference in the lifespan and in how well your saw runs.

I strongly advise using fresh gasoline with an octane rating of 89 or higher (mid grade or premium).

Most of the regular unleaded 87 octane gasoline that is available on the market today contains minimal amounts of detergent additives, which in four stroke applications keep pistons, valve stems, and fuel injectors clean. These same additives are needed in a two stroke engine to keep varnish, gum, and lacquer deposits from forming inside the engine. 

Pressure from the automotive industry has caused the gasoline suppliers to blend the 89 to 91 octane gasoline range with greater amounts of detergents and anti-oxidizing additives to prevent formation of deposits and keep engines clean.


Lack of detergent additives in two stroke fuel will cause heavy buildup of varnish, gum and lacquer deposits on the piston surface and inside of the ring grooves. Heat transfer from the piston to cylinder will suffer. Once the ring starts sticking in the ring grooves, combustion flame and exhaust gases will leak past them, further overheating pistons causing galling or seizures.

Since alcohol has been added to gasoline, power equipment manufacturers do not recommend storing fuel for more than 30 days. This period can be even shorter in hot and humid climates. Today, gasoline is considered too old for use in the two stroke engines if it’s older than 30-45 days. 

Fuel older than 30 days will begin to form varnish and gum. When the varnish and gum are heated by the combustion, they combine and form the byproduct tar. The tar byproduct is the number one cause of blocked spark arrestor screens and stuck piston rings. 

Since old gasoline won't vaporize well in the crankcase, the fuel will puddle in the crankcase, causing spark plug fouling, engine flooding and hard starting. Old, stale, oxidized fuel will also quickly form gum, varnish and deposits inside the carburetor and fuel system components. This is the most commonly found issue at many dealerships at the beginning of the season, primarily with products that are used seasonally.

"Moral of the Story"
Use only fresh mid-grade or premium gasoline in your chainsaw engines and other 2 cycle engines. It'll make your chainsaw last longer and run better with less maintenance and repair hassle.